Mapillary
Map Creator offers the ability to display street-level imagery from our partner Mapillary. Their community has collected over 75 million photos globally which can be used to edit the map. As an addition, traffic signs can be displayed. They are derived by the imagery based upon recognition software. These traffic signs are available for 90 countries.
If you are interested to join the Mapillary community to do your own image capture drives, then you can create an account using Map Creator. For detailed information regarding the driving set up click here, on the Mapillary User Guide.
1 Create a Mapillary account
Follow the below steps to create an account for Mapillary:
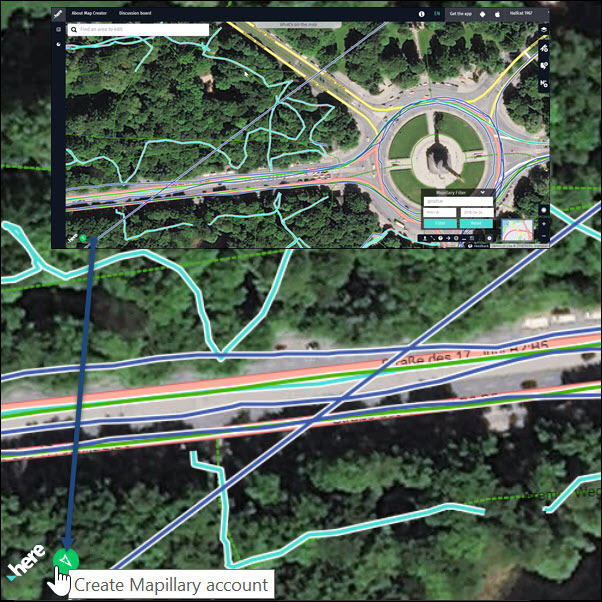
1) Click on the Mapillary button in Map Creator.
2) Click on the Mapillary icon on the left bottom side.
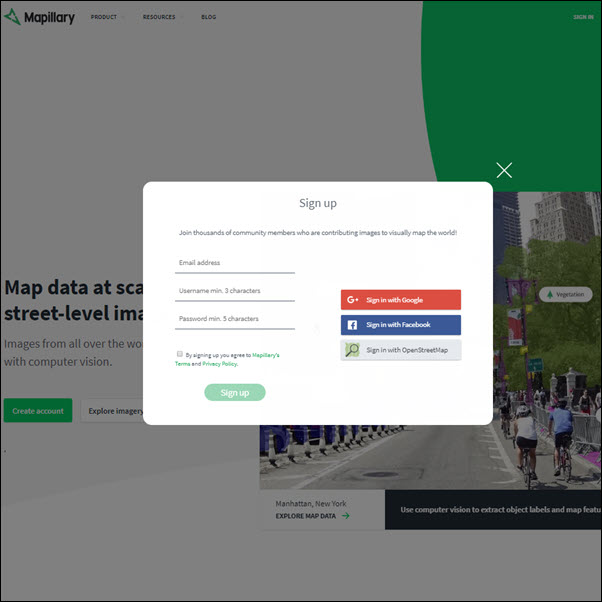
3) Sign up using the form.
2 Mapillary street-level imagery
If you want to use the Mapillary street-level imagery then you need to do the following:
1) Make sure that you are in the correct zoom level to activate Mapillary. The needed zoom level value is 16.
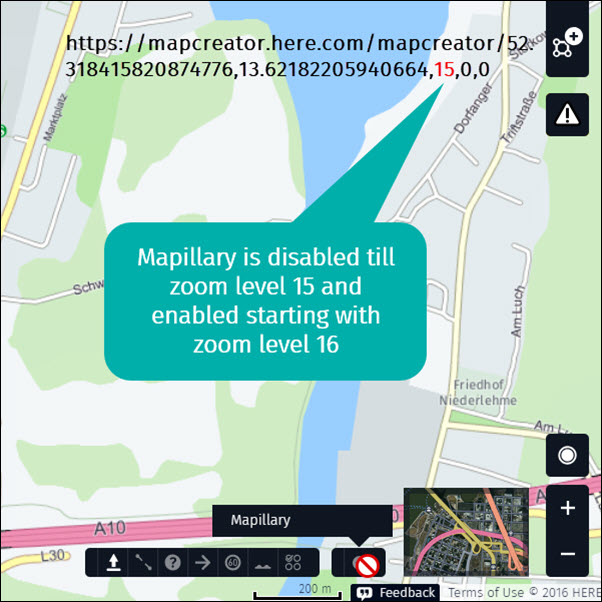
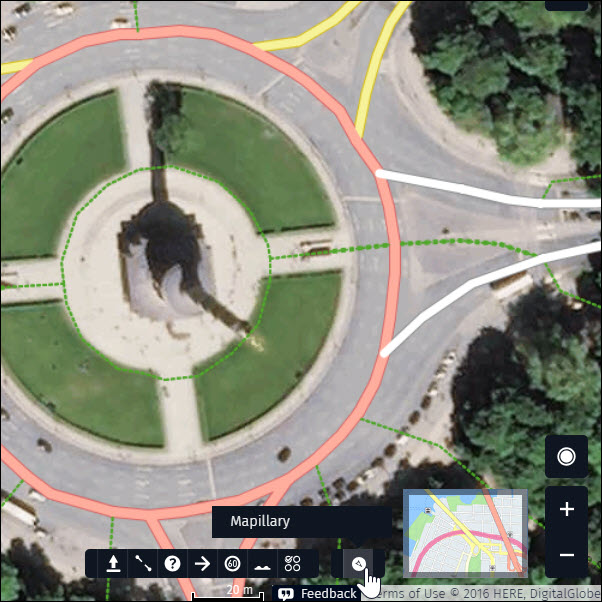
2) To see Mapillary street-level imagery, click on the Mapillary button.
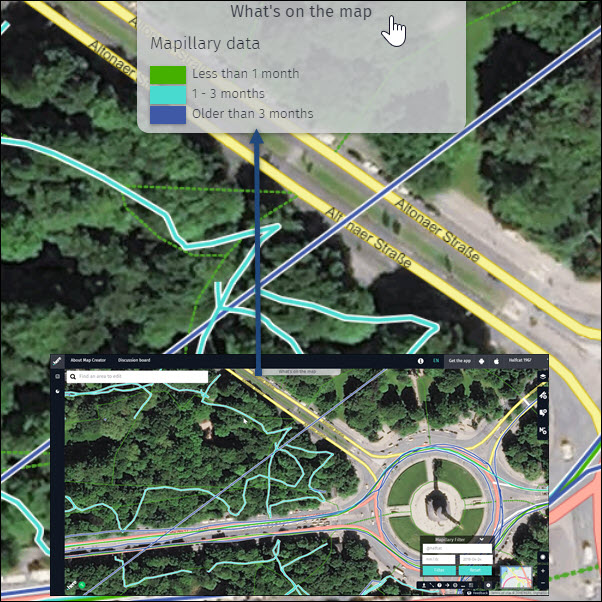
3) After activating the layer, you will see colored lines that represent the street-level imagery and imagery age.
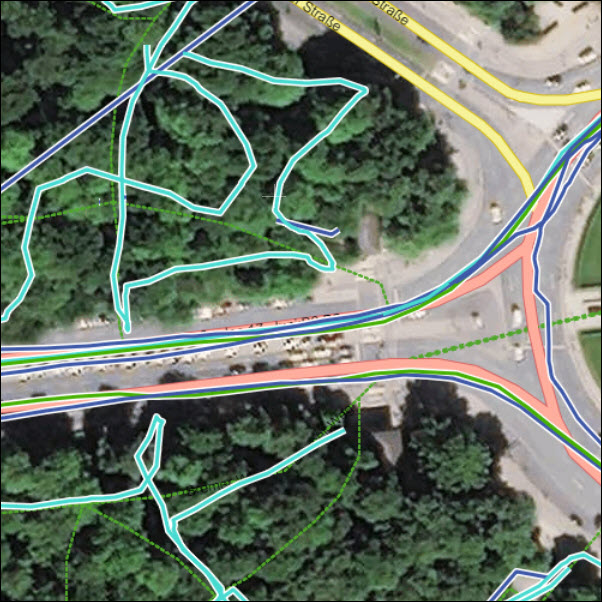
4) Click on the “What´s on the map” button to open the map legend with a description of the colored lines age.
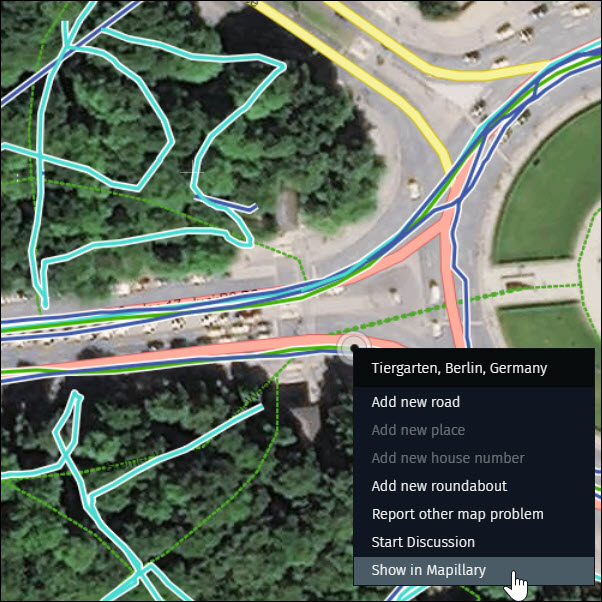
5) To view an image at a specific location, right-click on the colored line and select “Show in Mapillary” or directly click on the location with a left-click.
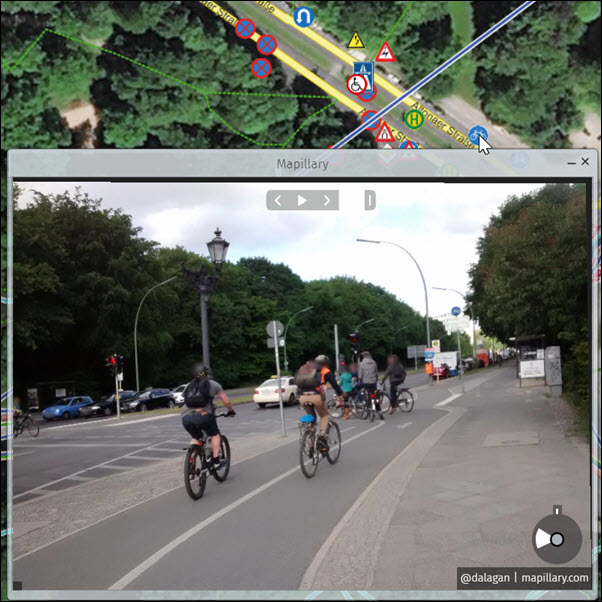
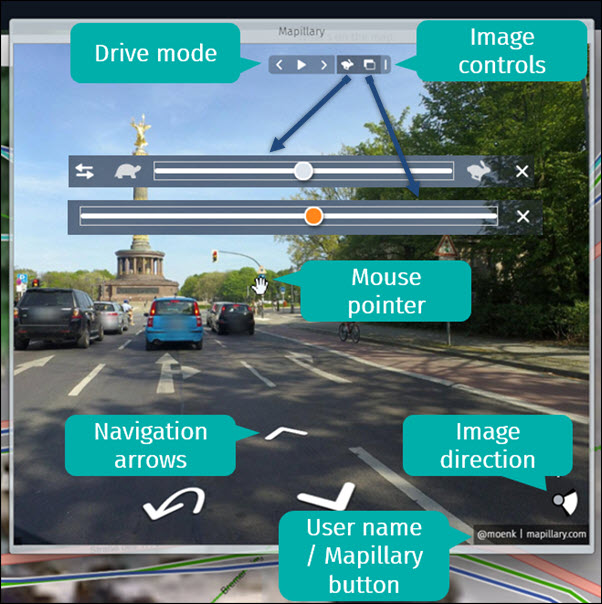
6) The image viewer opens with the following additional information and options:
- User name
- User who captured the image.
- Click the user name to learn more about the user’s image collection history in Mapillary.
- “Mapillary.com” button
- Opens the image on the Mapillary website in a bigger size. If desired, sign in/sign up for Mapillary while on the site.
- Image direction
- Indicates direction the lens was facing when the image was captured.
- Navigation arrows
- Use the arrows to navigate along the road.
- Drive mode
- Click on the center button to automatically display images in sequence.
- Click on the left button to scroll through single images backwards.
- Click on the right button to scroll through single images forwards.
- Other image controls under “I”
- Click on the “Rabbit” icon to define the speed of the drive mode.
- Click on the “Screen” icon to manually scroll through the images.
- Mouse pointer
- Use the mouse pointer to pan around the image.
- Use the mouse wheel to zoom in and out.
- Additional functions
- Adjust the side frames to enlarge or diminish the “Image viewer”.
- Move the “image viewer” to a second monitor if available.
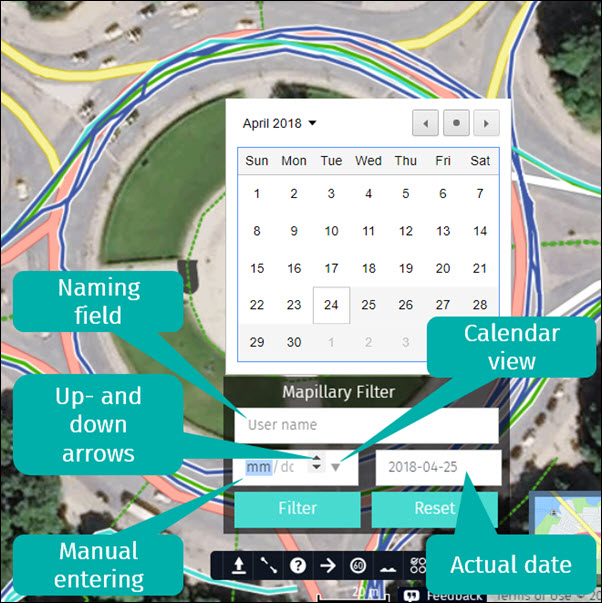
7) You might recognize that after activating Mapillary a filter panel opens with a couple of options:
- User name
- Naming field:
- Filter for a user by entering the name in the field.
- Naming field:
- Date
- You can enter a date range to narrow a specific time frame or to filter for the freshest images.
- Manual entering:
- Highlight the day, month or year and enter the value manually.
- Up- and down arrows:
- Highlight the day, month or year and use the arrows to increase or decrease the value.
- Calendar view:
- Click on the arrow to open the calendar and chose a date.
- Actual date:
- The right date field always shows the actual date but can be changed as well.
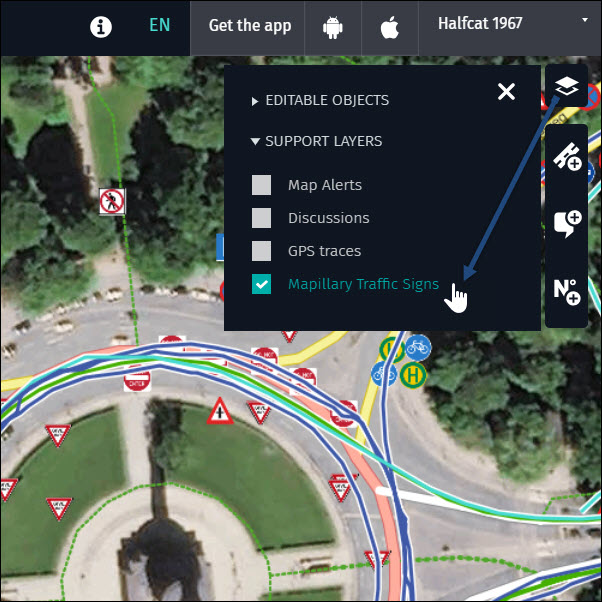
3 Mapillary traffic signs
In addition you can also load traffic sign information. What you need to do is the following:
1) You can load the data with or without street-level imagery by simply activating the “Mapillary Traffic Signs” layer in “Support Layers”.
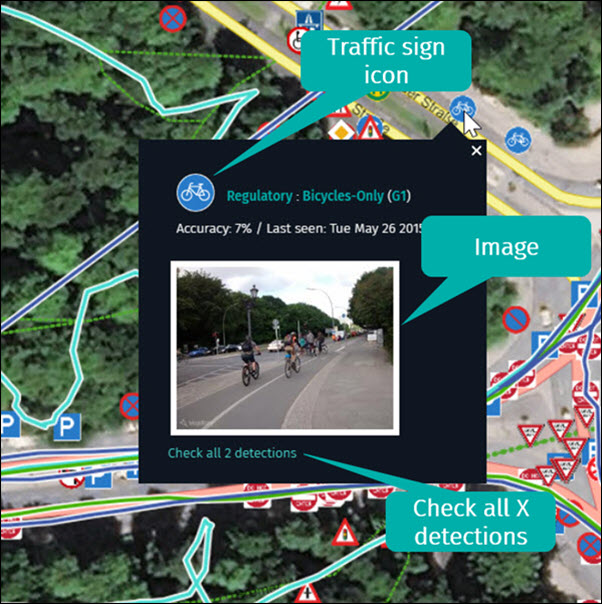
2) After the traffic signs appear you have two options to see more details behind them:
- Hover your mouse over an icon
- A pop-up shows up with more information about the recognized sign.
- Traffic-sign icon:
- The traffic sign icons include info about the sign type.
- Image:
- You can click on the image to enlarge the “Image viewer”
- Check all X detections:
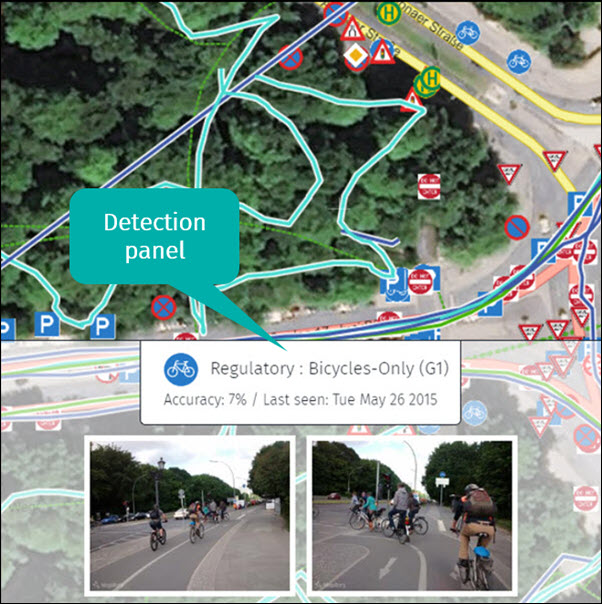
- Click on the button to open the “Detection panel” to see all related images which are used for the sign recognition with an accuracy value and a “last seen” date.
- Click on each of the detection images to open the “Image viewer”.
- Make a right-mouse click on the icon
- In this case, the “Image viewer” opens directly.