Additional place editing tools
1 Upload a picture related to a Place
You can upload an image to clarify a Place edit. Uploaded images are only visible to internal experts and used as reference.
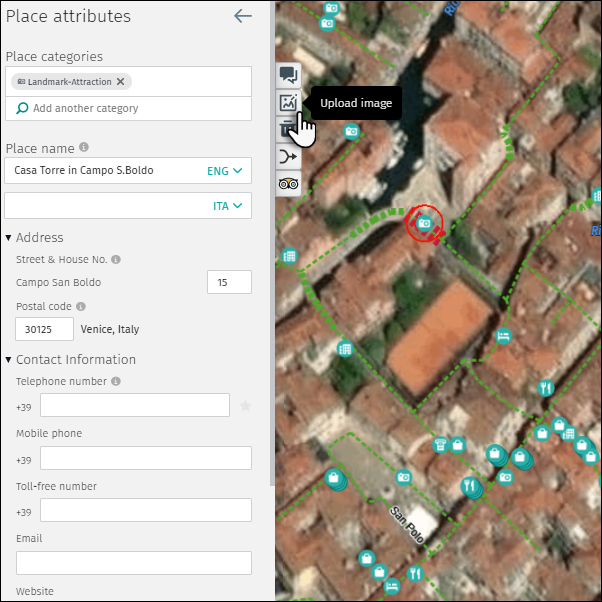
1) Select the relevant Place.
2) Click on “Upload image.”
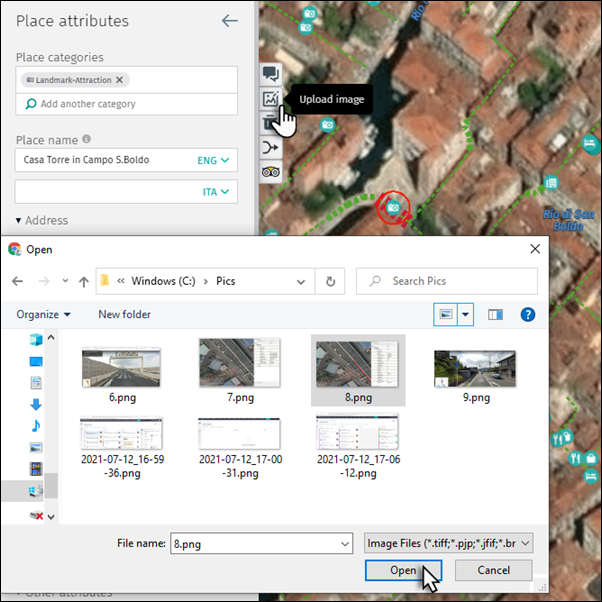
3) Browse your computer, select the image for uploading and click “Open.”
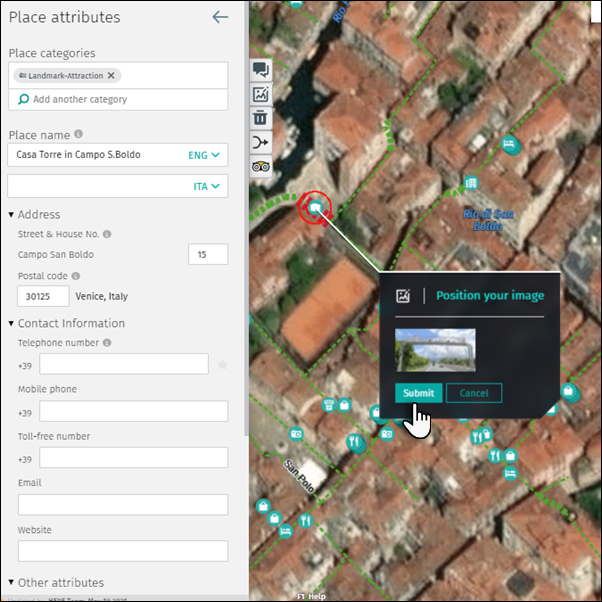
4) After clicking “Open”, the image preview appears and the image can be submitted or the upload can be cancelled.
2 Discussions
You can start a Discussion about a place or reply to Discussions started by another user.
2.1 Start a Discussion
There are two methods to open the Discussion window.
2.1.1 “Start discussion” from the “Place attributes” panel
1) Select the relevant Place.
2) Click the “Start discussion” button on the “Place attributes” panel.
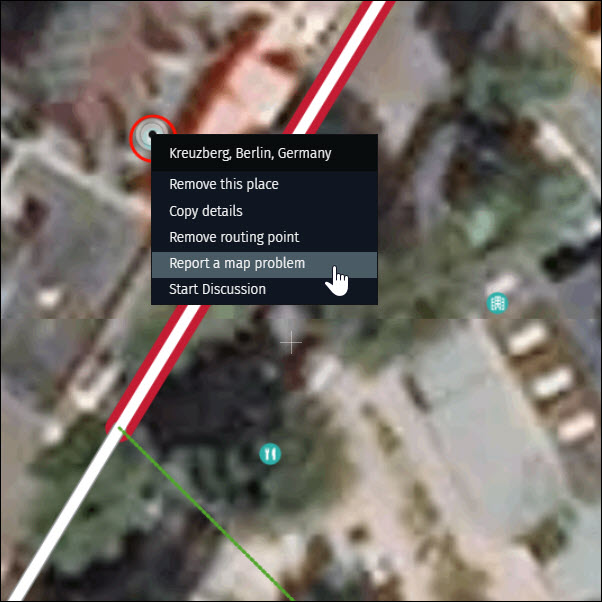
2.1.2 “Start discussion” method from the place
1) Right-click on the relevant Place and select “Start discussion.”
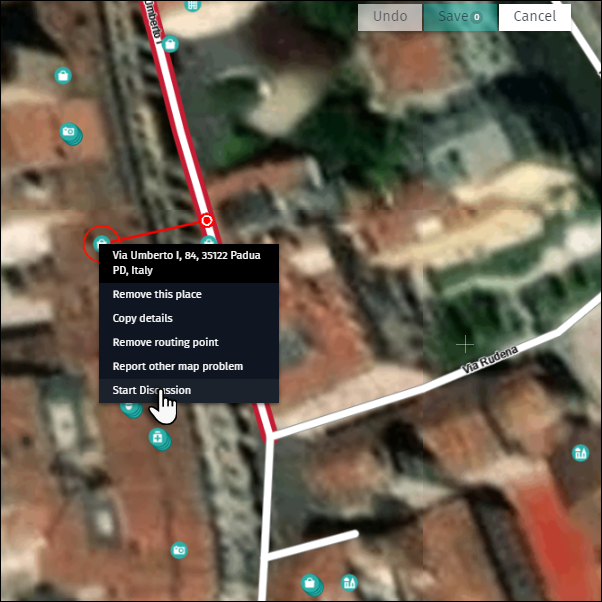
The next steps are the same:
- Complete the “Start discussion” form and click “Submit”
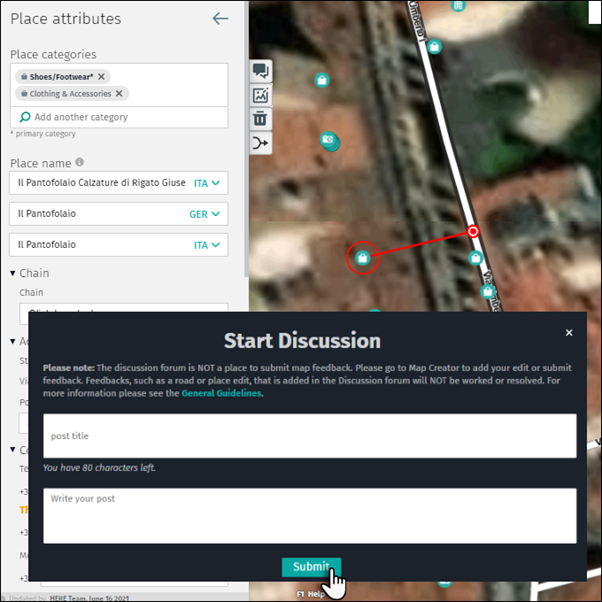
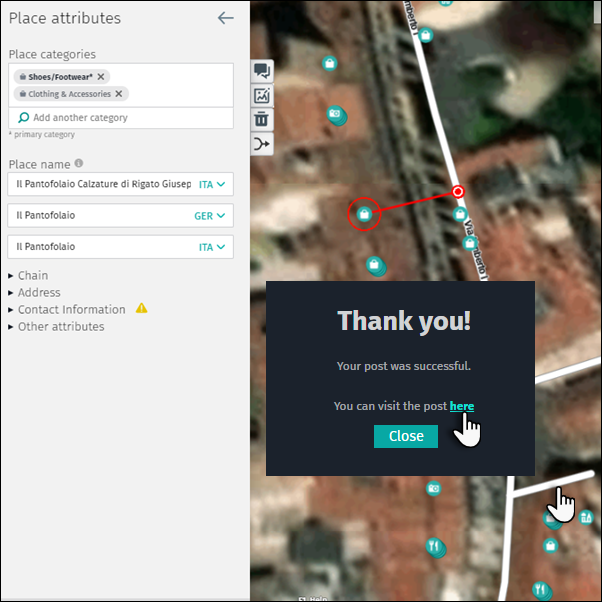
- Once submitted, visit your post on the Discussion Board by clicking the provided link.
2.2 To see your Discussions or Discussions by other users
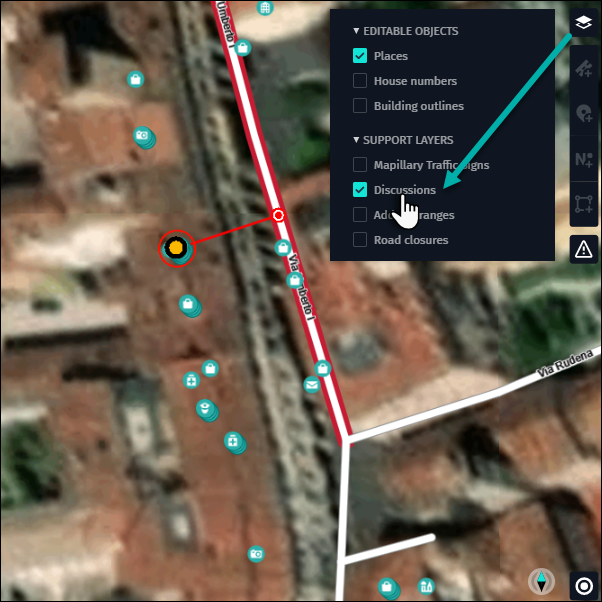
1) Open the layer menu and expand the “Support Layers” option
2) Activate the “Discussions” checkbox if you want to see Discussions in your area. Discussions are marked with a yellow icon.
2.3 Reply to other Discussions
1) Press the icon to read the Discussion and then press “Reply”
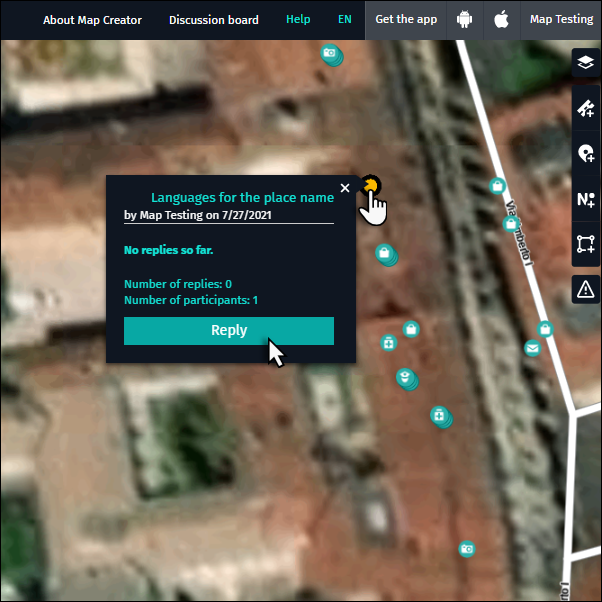
2) the Discussion board will open

3) Type a reply and click “Submit”.
NOTE:
- Discussions are visible to all Map Creator users.
- Discussions cannot be deleted.
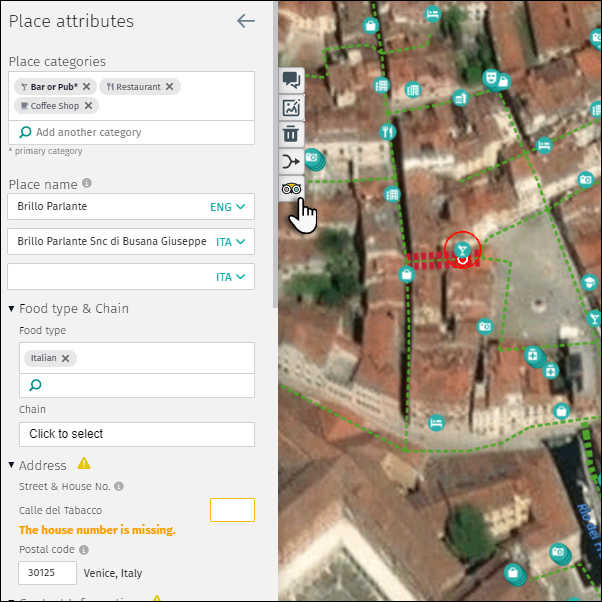
3 Trip Advisor source button
Map Creator offers the ability to link to a Place’s Trip Advisor page (if available).
1) Select the Place. The “Place attributes” menu appears.
2) If the Place has a Trip Advisor page, the corresponding icon appears on the right side of the “Place attributes” menu.
3) Click on the button and the webpage opens.
4) If necessary, use information from the webpage to modify the Place.
4 Report non-editable Place issues
You can report a Place-related issue which cannot be edited in Map Creator by using the “Feedback” or “Report map problem” features.
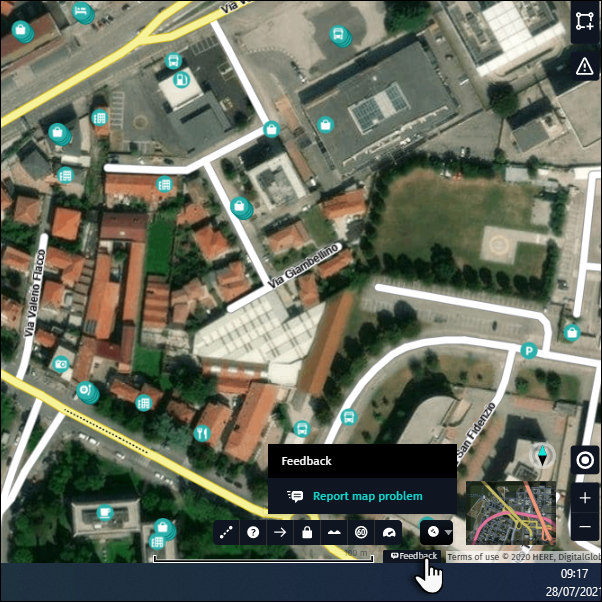
4.1 “Feedback” option via the footer section
1) Click the “Feedback” button.
2) Click “Report map problem”.
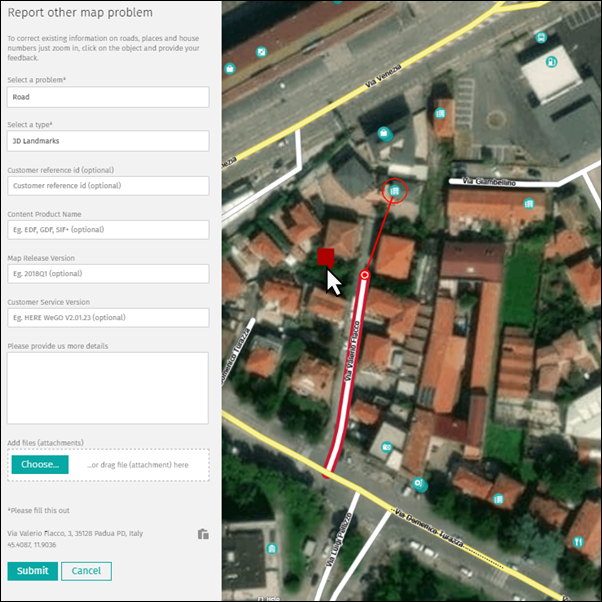
3) Complete the “Report another map problem” form.
- “Select a problem” that best describes the issue.
- “Select a type” that best describes the problem.
- The other attributes are optional.
- Add your comment to the “Please provide us more details” field.
- “Add files (attachements)” as reference for your report (optional).
- If needed, move the red marker to the location of the map problem.
- Click “Submit”.
4.2 “Report a map problem” functionality
1) Right-click at the map problem location and choose “Report a map problem” from the menu.
2) Complete the “Report a map problem” form (see example above) and click “Submit”.
Note:
- Images and detailed comments speed up processing.