Place editing
1 Pre-conditions
For the best Places editing experience, follow these tips:
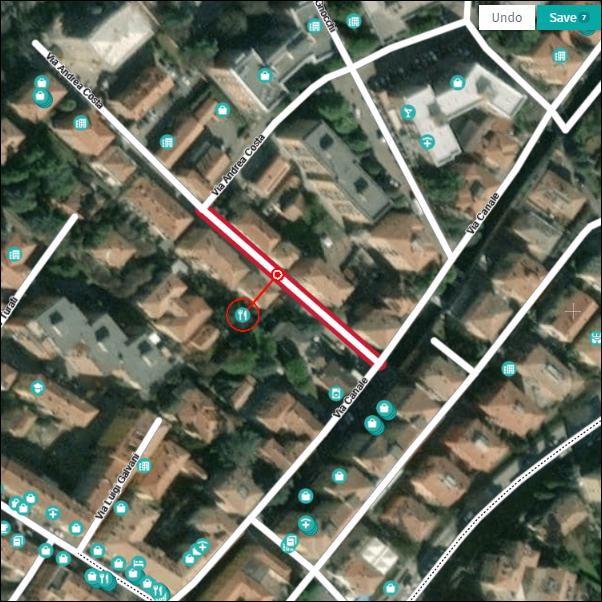
1) The Places layer is visible at zoom level 18 or closer.
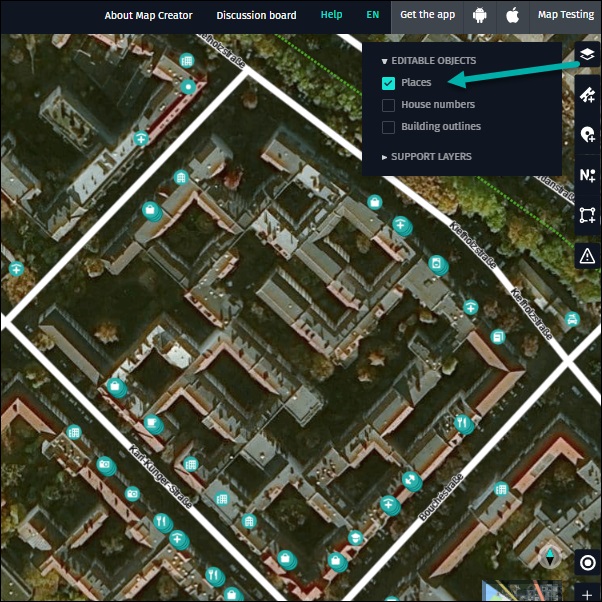
2) Activate the Places layer.
- The Places layer is normally visible by default. If it’s not visible, activate it by opening the “Edit toolbar” and clicking on the “Places” checkbox.
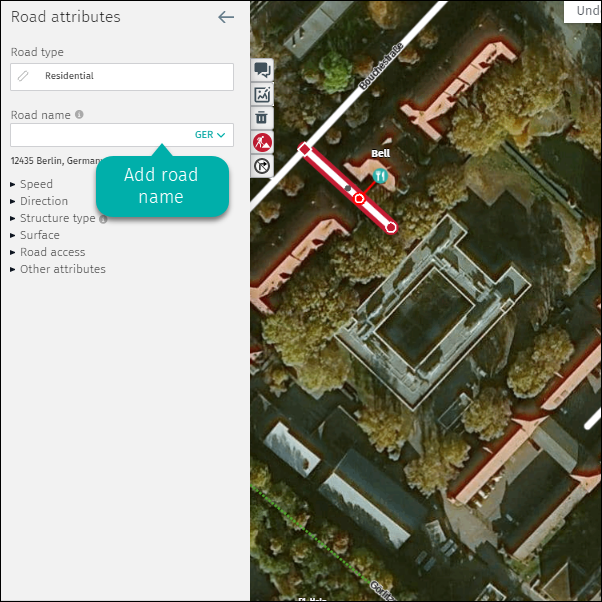
3) When editing a Place, there should be a name on the road segment that contains the Place’s routing point. If the road segment is unnamed or the name needs to be updated to reflect reality, go to the “Road attributes” menu and perform the appropriate road name edits first.
Tip:
- When editing Places, turn off the “House numbers” layer to reduce the number of icons on the screen.
2 Adding a Place
Add Places by:
- Using the “Layer activation bar”
- Using the “Add new place” feature
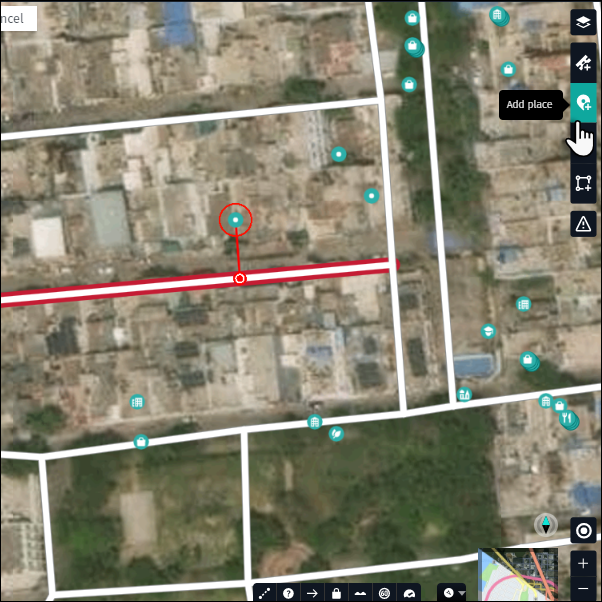
2.1 Adding a Place with the “Layer activation bar”
1) Click on the “Add place” icon in the “Layer activation” bar.
2) Click the location on the map where you want to add a Place.
3) The Place icon and “Place attributes” menu will appear.
4) Adjust the display and routing points if necessary.
5) Select a Place category and add other attributes.
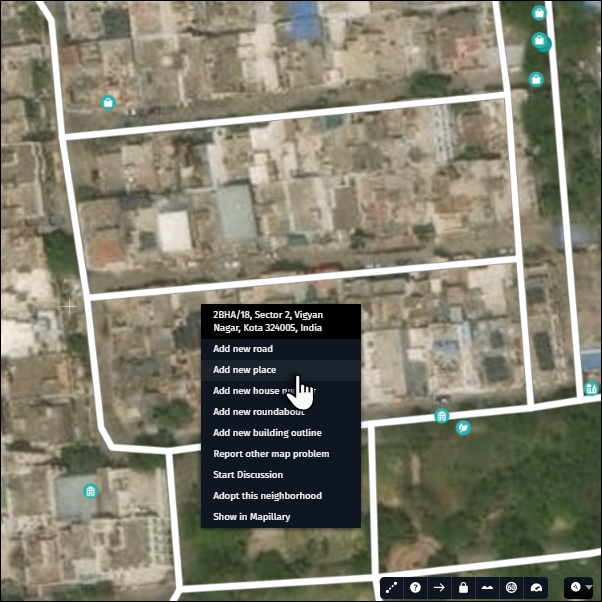
2.2 Adding a Place via the “Add new place” feature
1) Right-click on the map at the location where you want to add a Place. Select “Add new place.”
2) The Place icon and “Place attributes” menu will appear.
3) Adjust the display and routing points if necessary.
4) Select a Place category and add other attributes.
3 Modifying a Place
Modifying a Place includes edits like updating the street name, adjusting the display/routing points, and updating attributes n the “Place attributes” menu. Modifying any of these features should be done with caution and based upon local knowledge. To modify a Place:
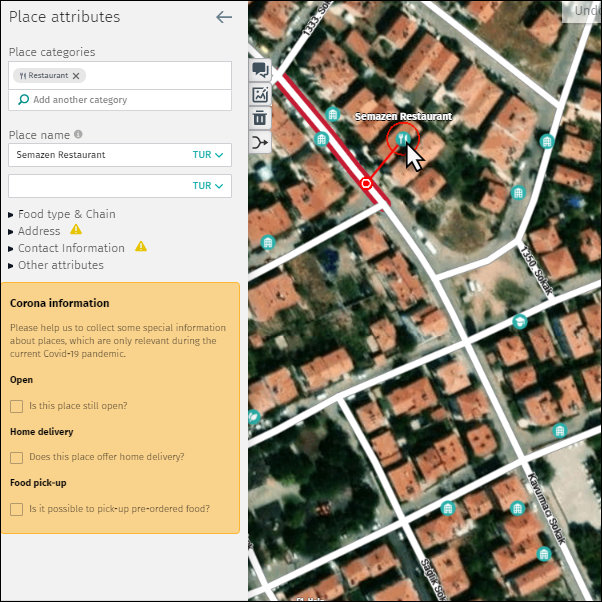
3.1 Select the Place icon
1) Click on the Place icon.
2) The “Place attributes” menu opens.
3) Update attributes as needed.
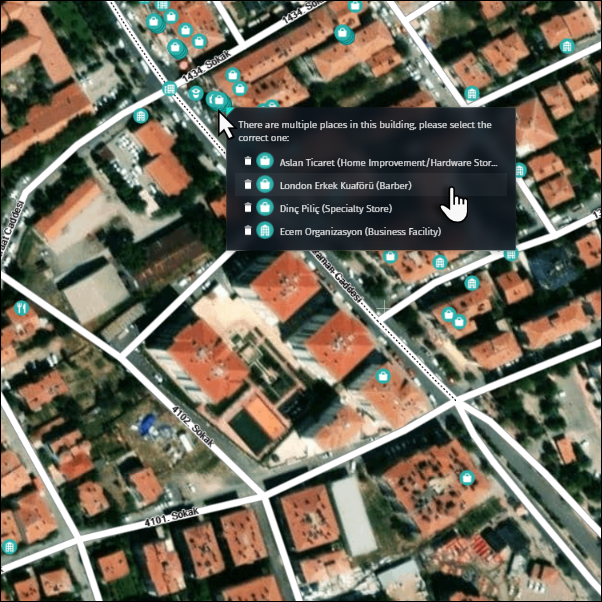
3.2 Select the Place from the stacked Places icon
It is possible that the display point of several Places is located at the same coordinates. In these cases you will see the stacked Places icon. Hover over the stacked Places icon to see a list of all Places at the same position.
1) Click on the Place to be updated. The “Place attributes” menu opens.
2) Update attributes as needed.
3.3 Updating the routing point location
In some cases it is more convenient to repair the routing point by deleting and adding a new one instead of moving it long distances over the road network. Typical examples are:
- The display point and routing point connection crosses multiple roads.
- There is a large distance between the display point and routing point.
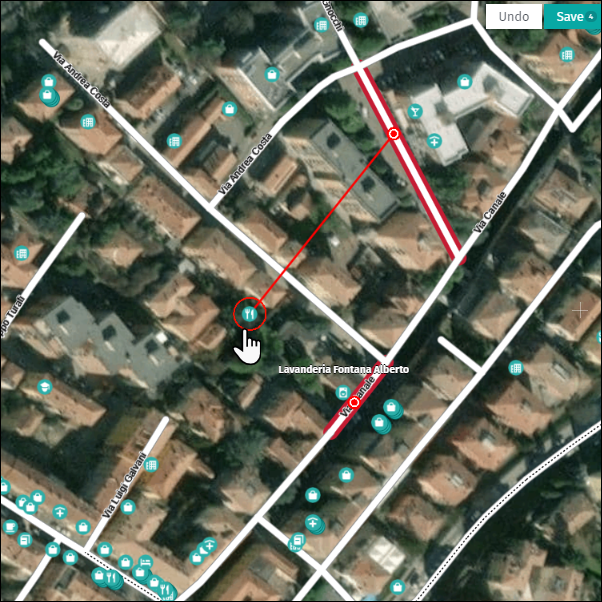
To repair the routing point:
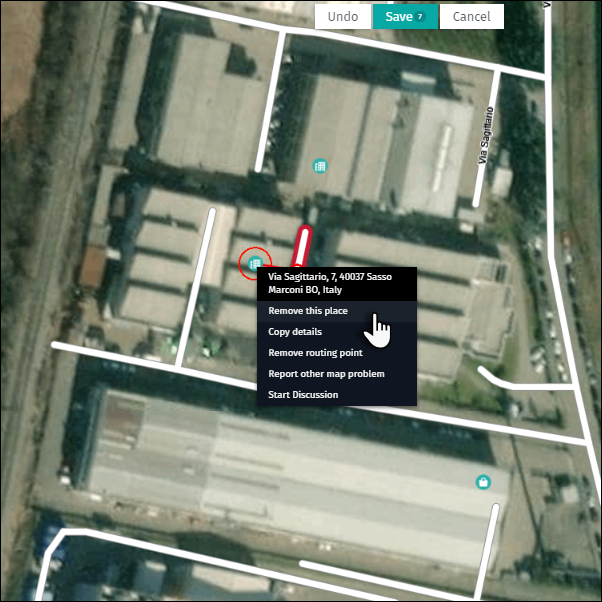
1) Right-click on the Place icon and select “Remove routing point.”
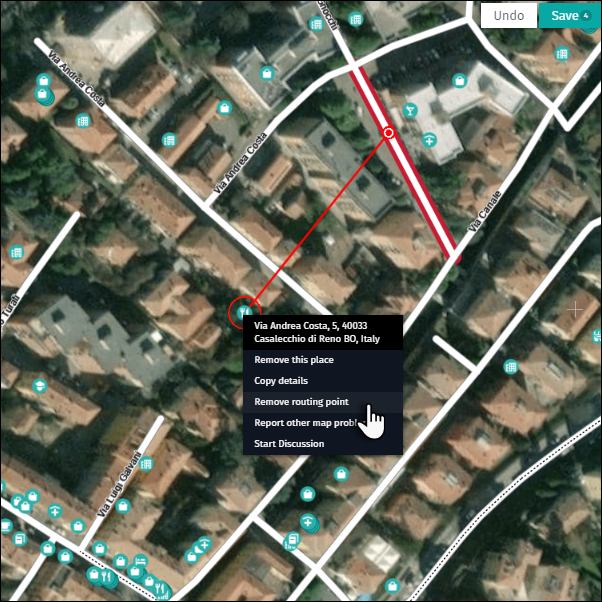
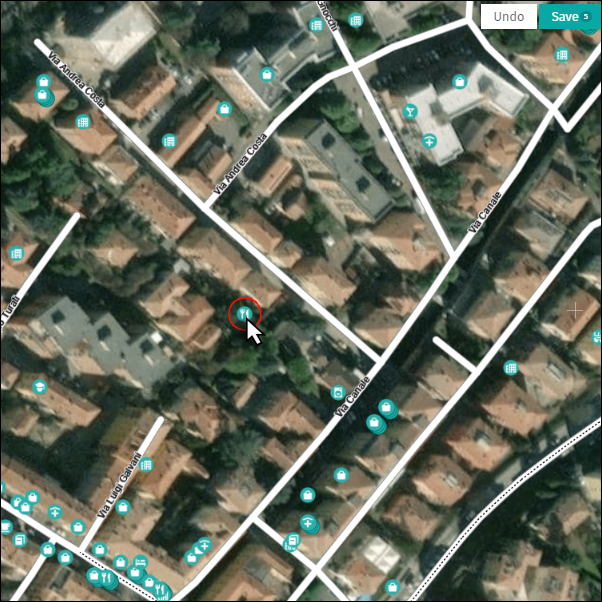
2) The routing point is deleted and the Place is no longer connected to the road network.
3) Right-click on the Place icon and select “Set routing point.”
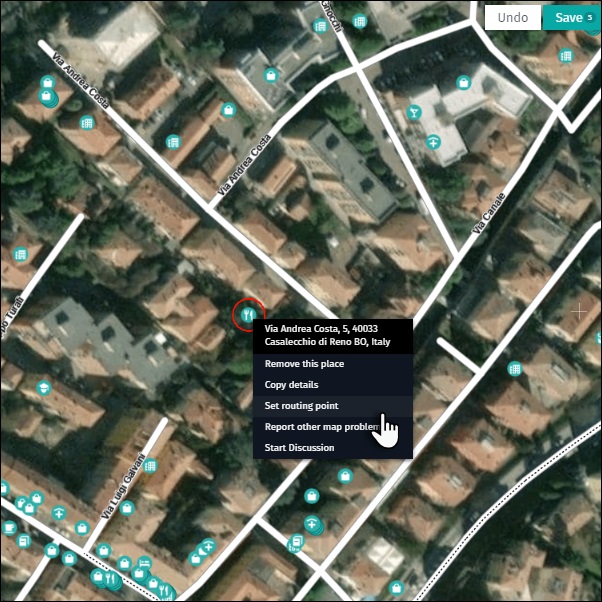
4) The new routing point is added to the nearest road.
5) Adjust the location of the routing point as needed.
4 Deleting a Place
Deleting a Place will remove it from the map. This should be done with caution and based upon local knowledge. There are three methods to delete a Place:
- “Remove this Place” feature
- Via the trash can icon
- Via “DEL” on the keyboard
4.1 “Remove this Place
Right-click on the Place icon and select “Remove this Place.”
4.2 Via the trash can icon
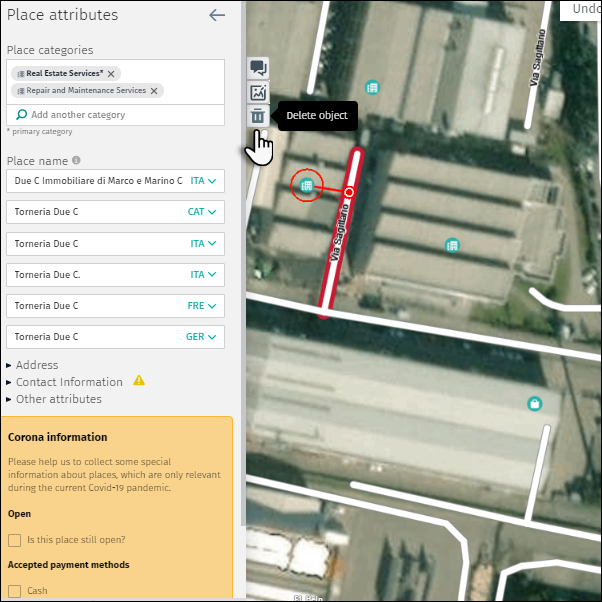
1) Select the Place and click on the trash can icon in the Place attributes panel.
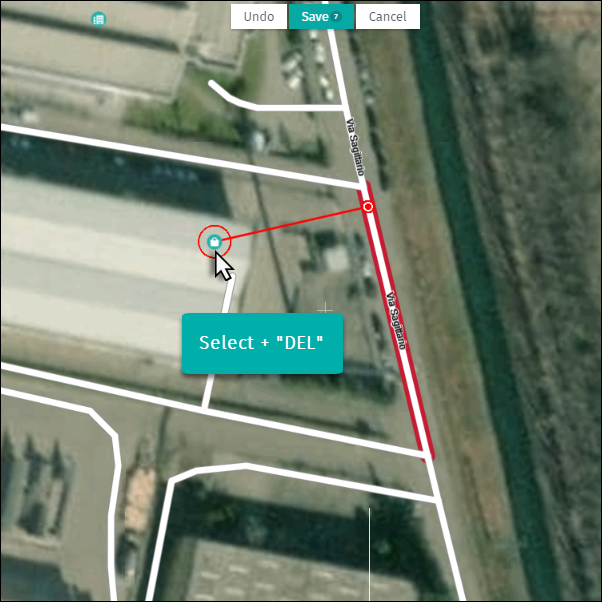
4.3 Via “DEL” on the keyboard
1) Select the Place and press “DEL” on the keyboard.
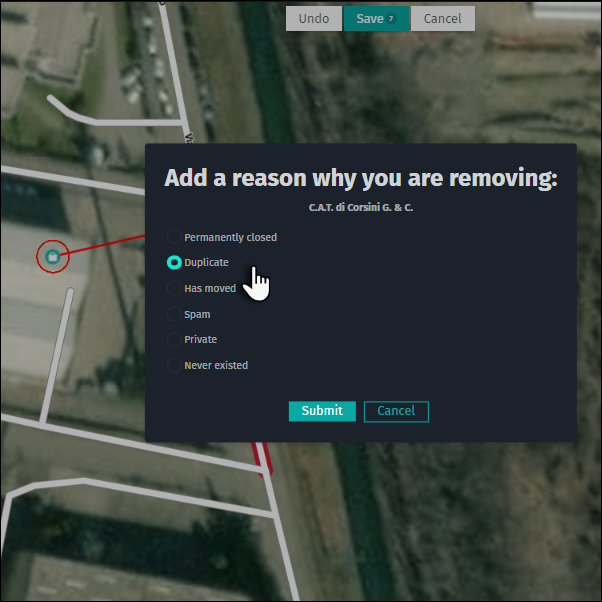
4.4 Reason message
When deleting a Place, a pop-up menu appears asking for the delete reason. There are six reason codes available:
- “Permanently closed”
- Use this reason code when the Place has been shut down.
- Duplicate
- Use this reason code when there is an identical Place in the vicinity.
- Note: delete the version of the Place with with less information or inaccurate attributes.
- “Has moved”
- Use this reason code when the Place moved to another location.
- Note: Before deleting, ensure the Place has been added at its new location.
- “Spam”
- Use this reason code when the Place is nonsense or inappropriate.
- “Private”
- Use this reason code when the Place is of private/home office nature.
- “Never existed”
- Use this reason code when the Place has been added erroneously.
5 Merging a Place
Sometimes there are duplicate Places but each one contains information for different contact types. In this case you can merge the Places. There are two ways to merge Places:
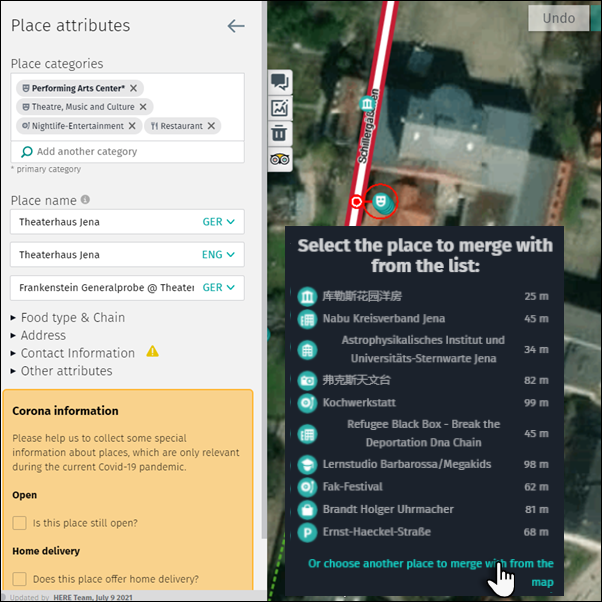
5.1 Select from the “Merge list
1) Select the Place and click on the “Merge” icon in the “Place attributes” menu.
2) The “Merge list” opens and shows nearby Places.
3) Select the Place to merge.
4) After the merge, review all attributes and modify if necessary.
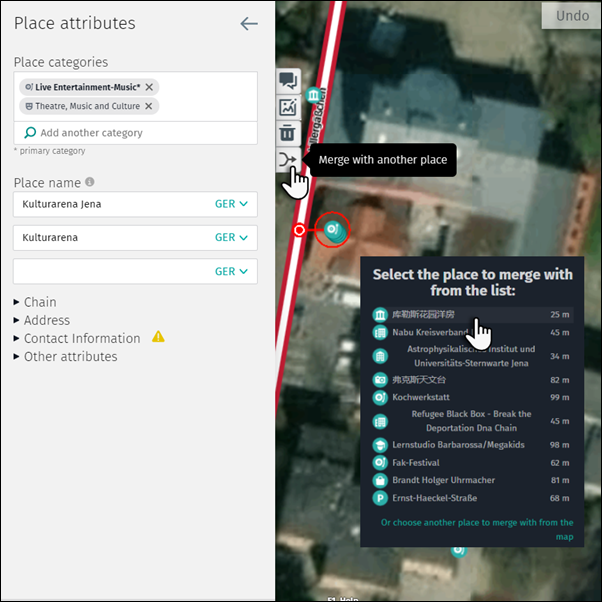
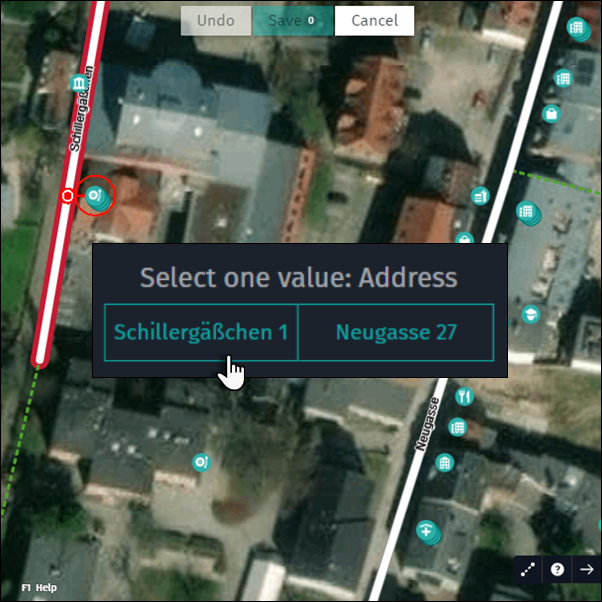
5.2 Select from the map
1) If the Place you want to merge is not in the “Merge list,” click “Or choose another another place to merge with from the map.”
2) Select the Place from the map. The two Places merge.
3) An error message appears if there is a conflict between the postal codes of the two merging Places. Choose the appropriate address.
4) After the merge, review all attributes and modify if necessary.